Q: How do I ensure perfect positioning during my guide rail installation?
“I made my own guide rails. It was a lot easier than I thought it would be. I have a question about my guide rail installation. How do I figure out exactly where to mark my drill holes? What is the best way to ensure that my guide rails are positioned perfectly?”
A: Here is a simple method that will give you hands-free access for easy drill hole marking.

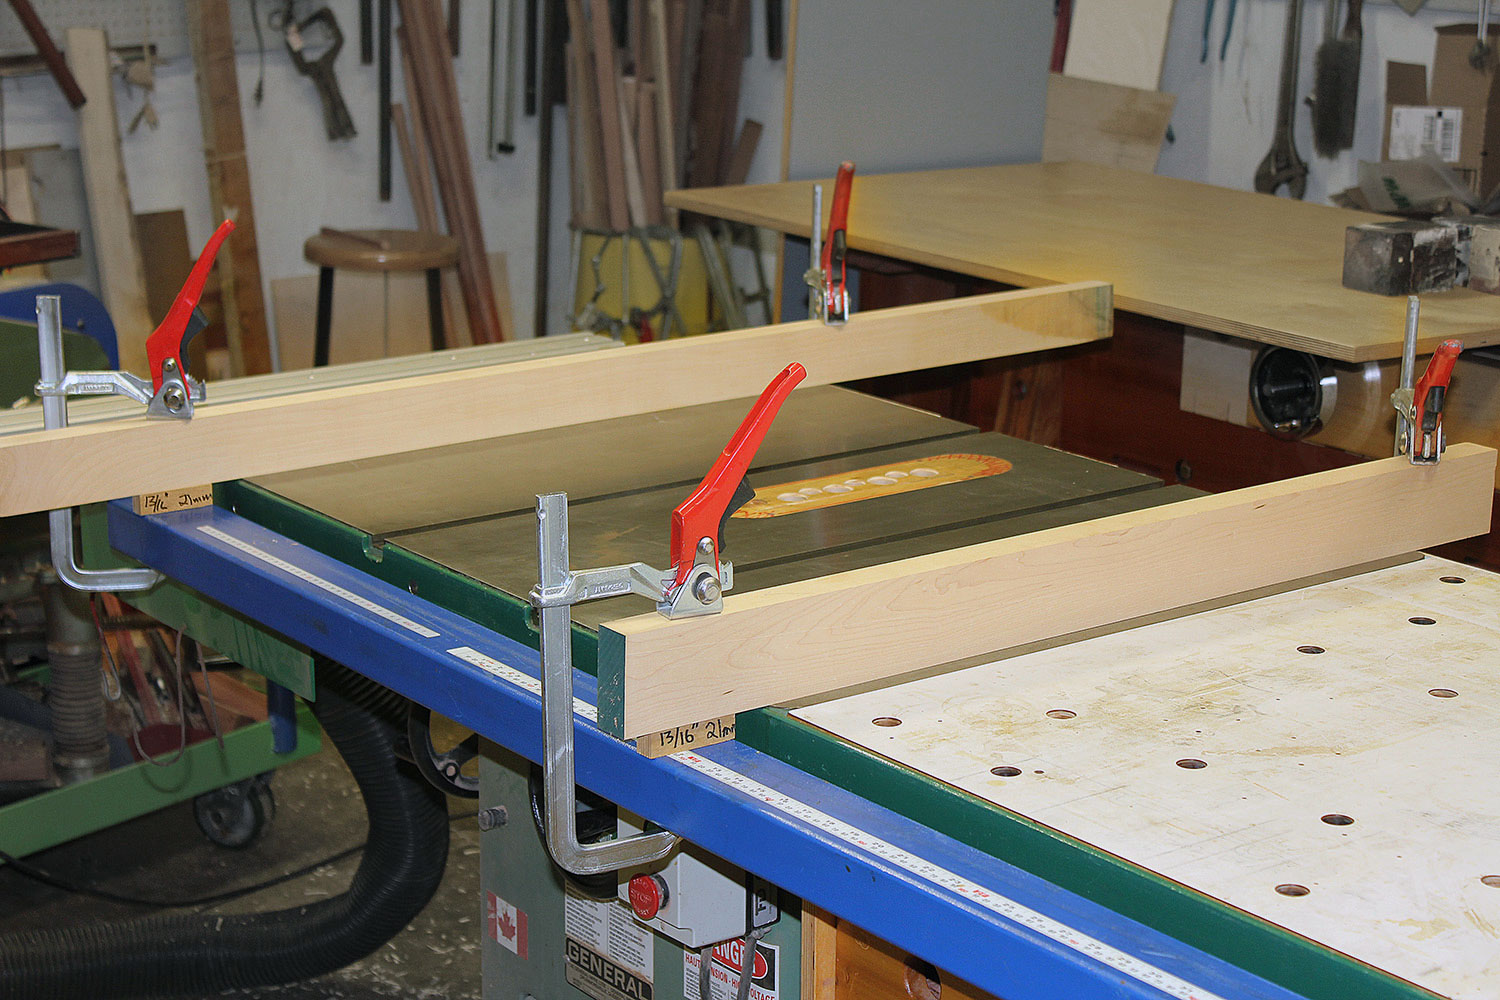
I love helping people problem solve their guide rail fabrication. I get asked this specific guide rail installation question all the time. Here is a alternative technique to the one I showed in my DIY Guide Rail video series. A picture is worth a thousand words, so I’ve included two photos that I think say it all. (Click any photo to enlarge.) When you are ready to install your new guide rails, here is an easy way to get your angle iron and tubing positioned so your hands are free to mark exact drill hole location.
You will need these items:
- 4 clamps (Any clamps will do. The clamps pictured are my Bessey Rapid Action LC 8’s)
- 2 pieces of stout straight wood. They should be long enough to span the depth of your table saw and guide rails.
- 2 wood spacers 13/16″ high. I made mine out of Baltic birch plywood scrap. 13/16″ X 3/4 X 3″ (21mm X 18mm X 75mm)
The Step Down Spacing Set Up
This simple set up positions the tubing and angle iron in the proper location for permanent guide rail installation. The 13/16″ (21mm) step down spacer is the exact dimension (as set by Biesemeyer) for installing Biesemeyer style guide rails. Clamping down these boards with pre-sized spacers holds the heavy angle iron and tubing securely. This allows you to work hands-free to mark your drill holes for perfect placement. Place the two boards as far apart as possible, but be sure to keep them on the cast iron (or granite ,or metal plate) portion of your table, for stability.
To attach the angle iron to the saw I used 5/16″ counter sunk, grade 8 bolts, 1.1/4″ long.
To attach the tubing to the angle iron I used 1/4″-20, grade 8, cap head screws, 3/4″ long. NOTE: A hex bolt would work just as well.
Visit the VerySuperCool Tools Flickr album: Guide Rail Installation to see even more photographs.