How To Use a Screw Extractor
A screw extractor is the solution to a number of common DIY issues which everyone faces in stripped and broken screws. Broken and stripped screws occur where someone has tried to remove a screw incorrectly or used the wrong tools resulting in the screw not being able to be removed with a screwdriver. A screw extractor tool should be used in order to remove these screws and enable the project to continue.
When To Use a Screw Extractor
There are a number of common issues DIYers face when undergoing projects. Screw extractors should be used in order to remove old screws that are no longer needed and cannot be removed by standard methods such as using a screwdriver or a set of pliers. Once a screw has been removed using a screw extractor it cannot be re-used as it will be significantly damaged.
Different Types of Screw Extractor
There are a number of different types of screw extractors and hence these require a different method of use. The most common types are those with burnished ends such as Grabit Screw Extractors or ones without such as these BlueSpot Screw Extractors.
The difference between these two types is simple, ones with a burnished end can be used to drill a hole into the head of the screw, then the other end of the screw extractor is used to remove the screw. With screw extractors lacking a burnished end, a drill bit will be required to make a hole in the head of the affected screw which can be used to remove it.

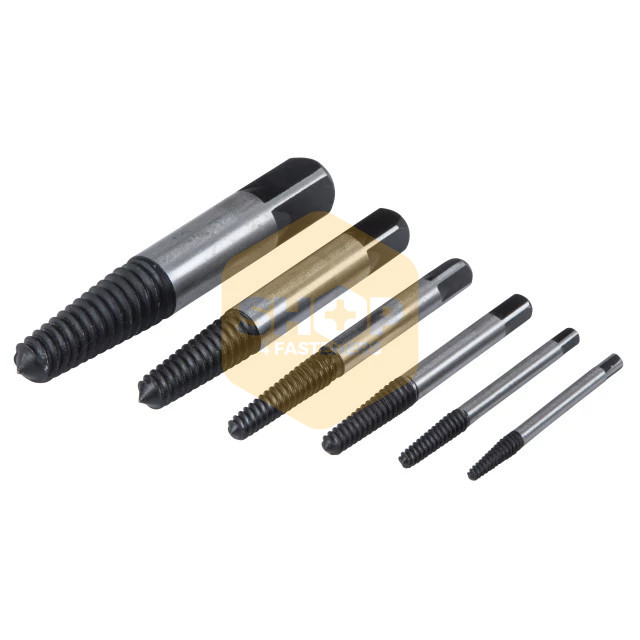
– Grabit Screw Extractor – BlueSpot Screw Extractor
Method
Equipment Required:
There are only a few tools required from your toolkit in order to use a screw extractor, although this does depend on the type that you have. Here is everything that you will need.
- Screw extractor tool.
- Goggles/Eye protection.
- Gloves.
- Power drill.
- Drill bit (only required if your extractor doesn’t have a burnishing end).
- Tap wrench.
- Cutting fluid, WD-40 or another lubricant.
Step 1
First of all, safety is important when drilling into metal as there can be parts that fly off and cause harm. Therefore, it is vital that you wear eye protection whilst using screw extractors along with gloves.
Step 2
Add a drop of the cutting fluid, WD-40 or lubricant to the head of the affected screw. This will assist in the drilling into the metal and protect your extractor tool.
Step 3
Choose the right size extractor for the screw that you are trying to remove. This can be done by ensuring the diameter of the screw extractor is smaller than that of the screw.
Step 4
Attach the chosen screw extractor to your power drill, using the burnished end, screw into the head of the screw. Ensure this is deep enough for the screw extractor to attach which is usually between ⅛“ and ¼“. If you have a screw extractor without a burnished end, then use the selected drill bit in order to drill into the head of the screw.
Step 5
Add the screw extractor to your power drill or tap wrench and begin to screw down into the hole that you made in the screw head. Once the extractor bites and grips the screw begin to reverse the drill (or reverse your tap wrench) and slowly remove the screw.
How We Can Help
At Shop4Fasteners, we have all the tools you need for any DIY project, view our range of screw extractors.